Training & Support
Wall Printer Training and Support from Delivery to Daily Printing
WallPrintJet wall printer training takes you from the crate on your floor to a finished, UV-cured wall, and the support behind it stays with the machine for as long as you print.
Built for first-time owners, sign and print shops, decorators moving between sites, mural artists and distributors.
- Calibratedsoftware installed before shipping
- Testedby a technician at the factory
- Reviewedinstallation checked from your video
- 10 minto learn the basic print workflow
- 2 yearsmachine warranty from purchase
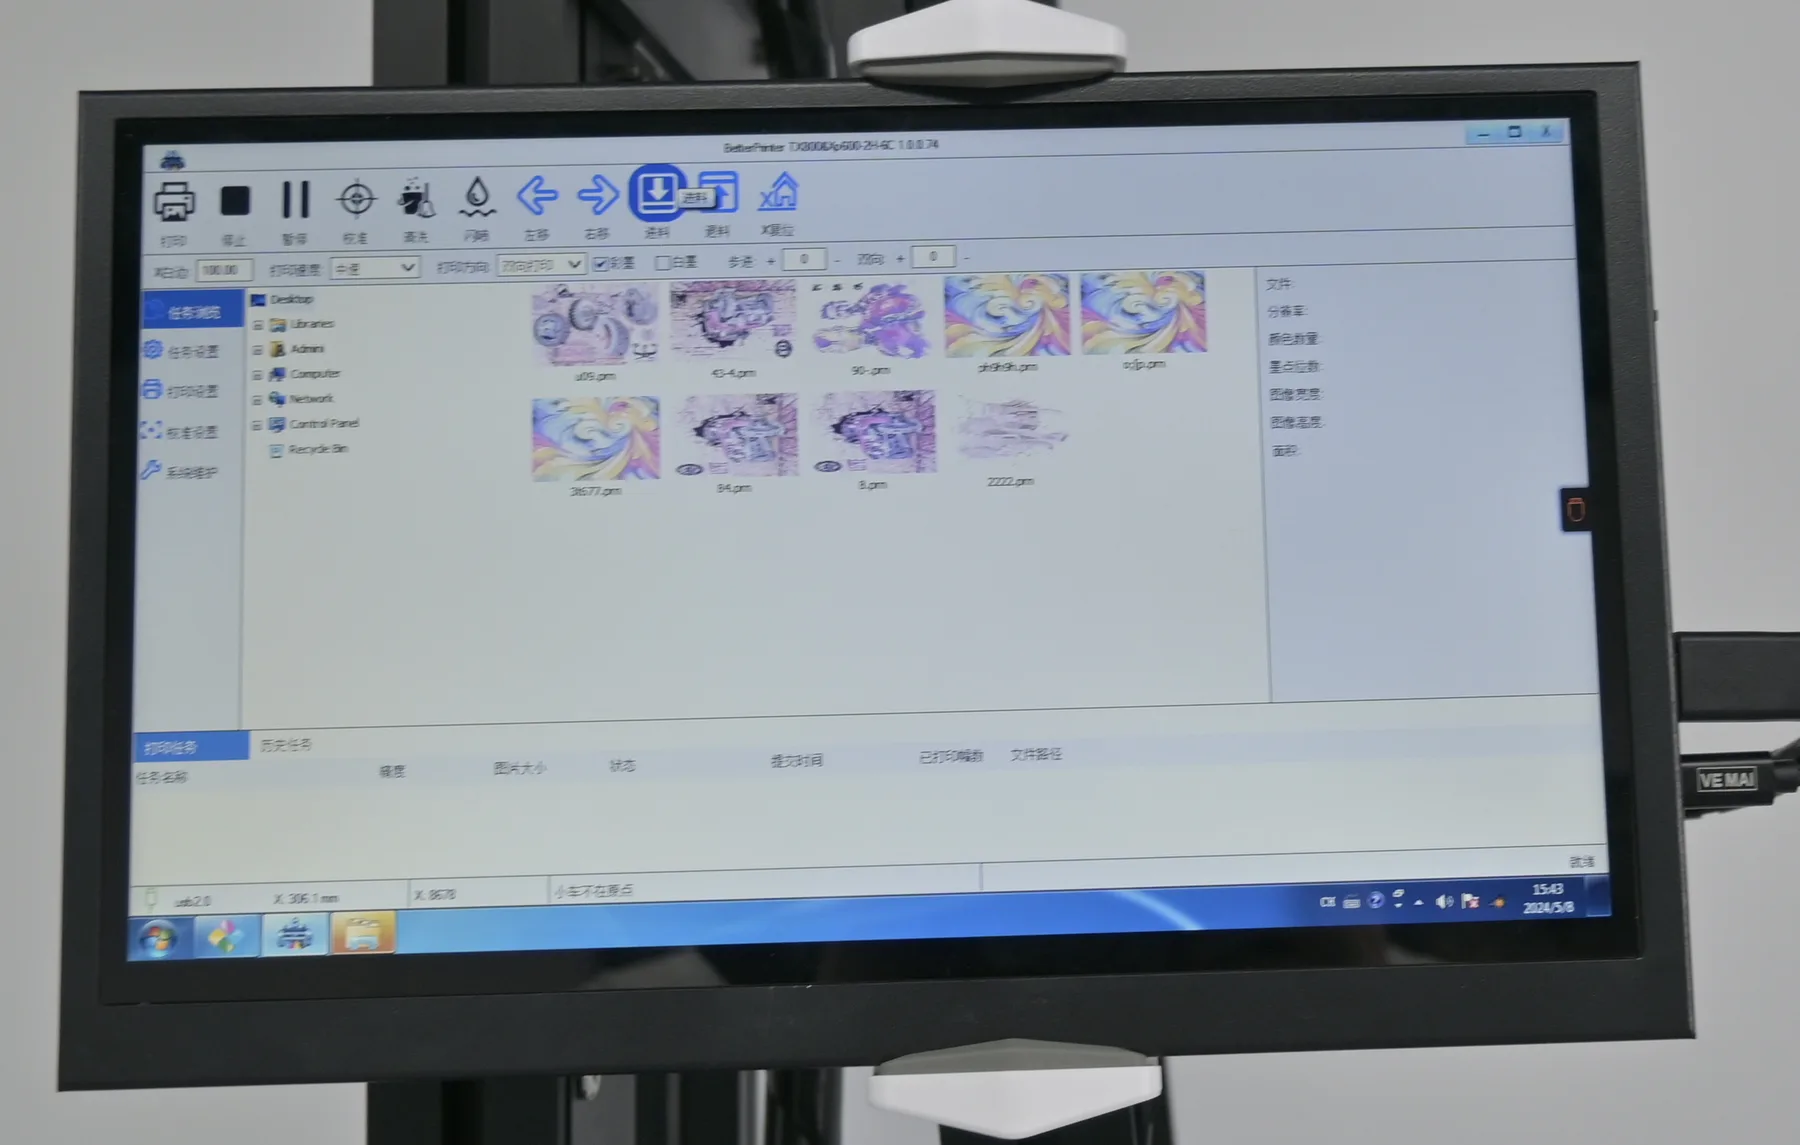
- 01Power
- 02Ink
- 03Image
- 04Mode
- 05Place
- 06Print
- What comes with the machineSupport package and how training runs
- Installation, step by stepSeven steps, then the print routine
- After-sales teamOne contact and the 2-year warranty
Part 1 · On delivery
Wall Printer Training and Support Included with Every Machine
Every GP200, GP200B, UP200 and UP200P we supply comes with the same wall printer training and support package. Filter it by where each part comes from.
Factory-calibrated software
BetterPrinter control software and the Ultraprint RIP installed before shipping, with ICC colour curves matched to the ink on your quotation, CMYK or CMYK plus white. Maintop is also supported.FactoryFactory test
A technician tests each machine before it is film-wrapped, crated and loaded for dispatch.FactoryAccessories
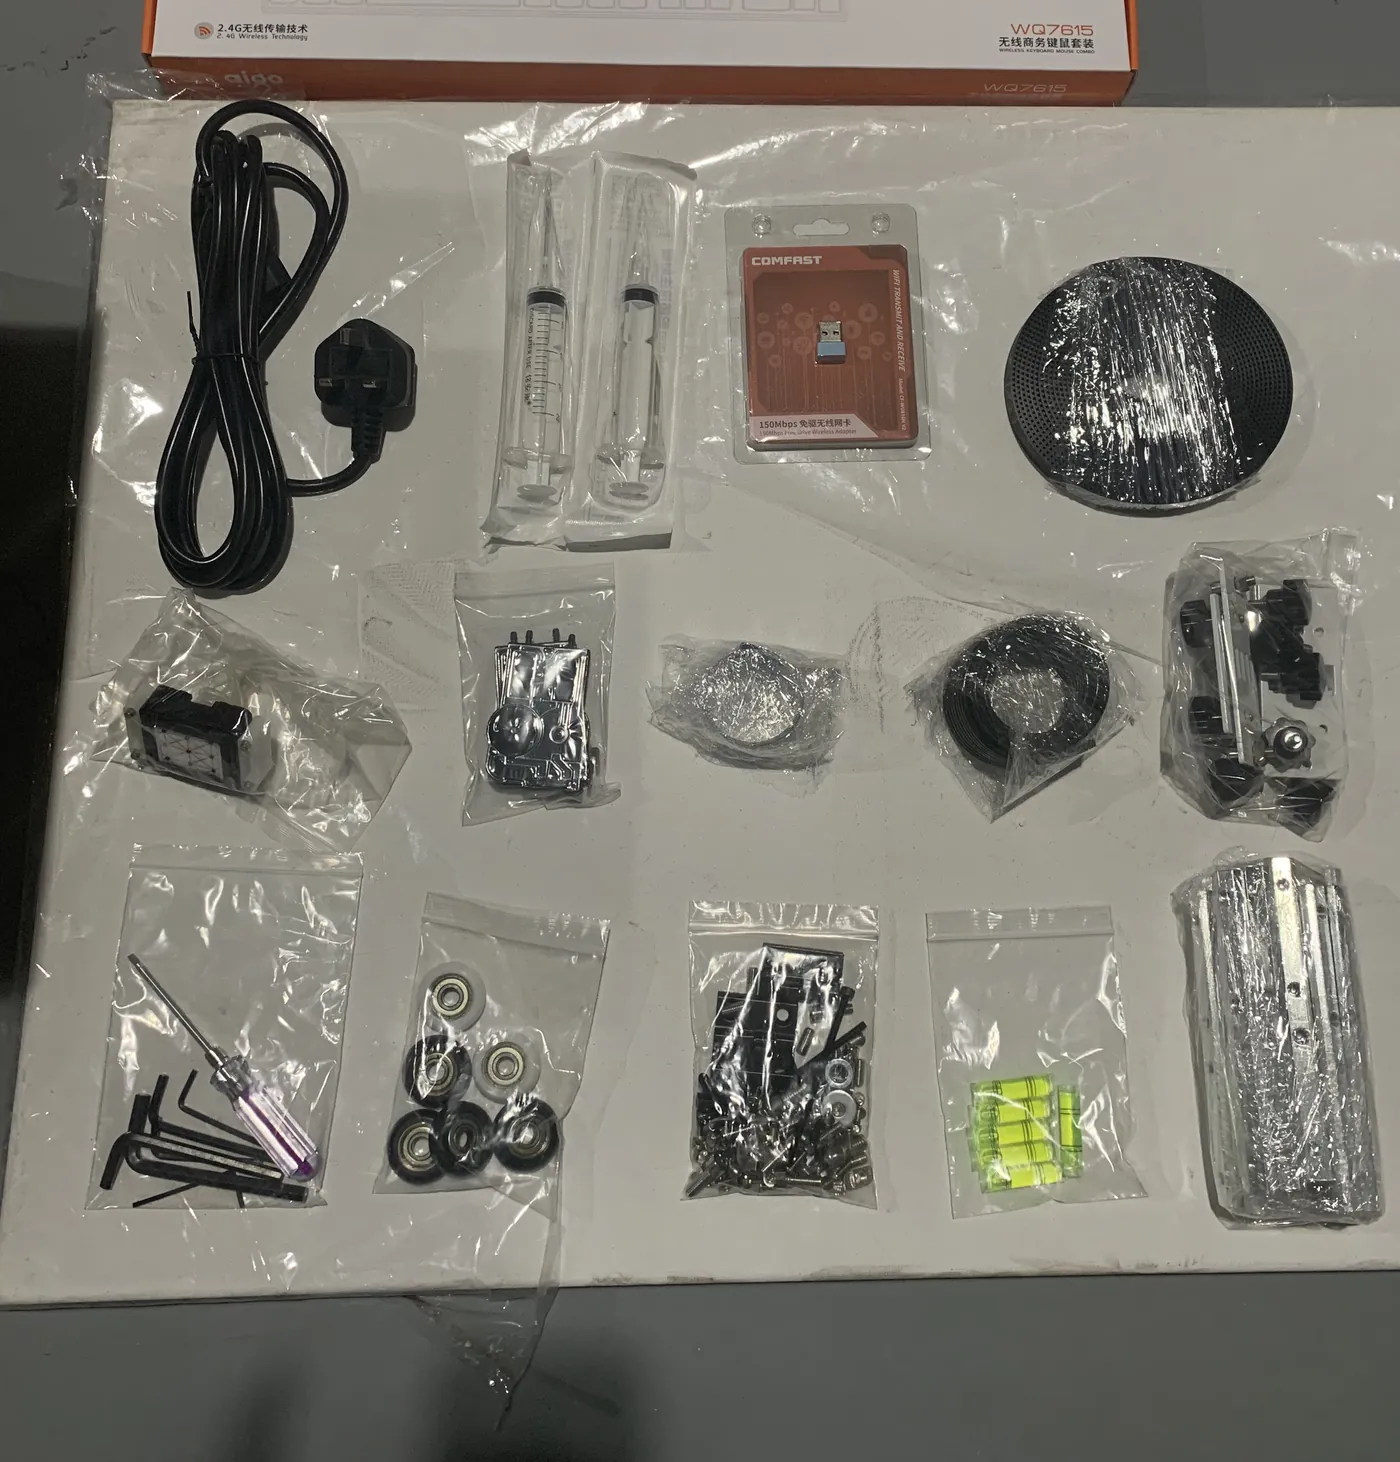
Ink, moisturising and cleaning liquid, electric and manual ink suction tools, ink dampers, ink tubes, ribbon cables, a belt, wheels, fixing strips and hex tools.CrateIllustrated manual
A picture for every assembly step of your model.CrateInstallation review
You film the assembled machine at the wall; an engineer checks it remotely.EngineerOperator training
Remote, through WhatsApp and email, built on the six-step routine and the video library.EngineerOnline after-sales
Engineers online during the warranty and after it.Engineer2-year warranty
On the machine, with every claim handled through WallPrintJet.Engineer
Software menus come in English, Chinese or Russian, depending on the series. You never build colour profiles yourself.
Part 1 · Training
Wall Printer Training in Three Stages
Wall printer training starts with the manual, moves to your first remote session, and stays open after that.
-
Assembly
The manual
Exact parts, screws and positions for your model; the seven shared steps are below. -
Operation
The first remote session
Follows the six-step routine. Most of it is you running it on your own wall with your own file while the engineer reviews your photos and clips. -
After that
The video library
What you come back to alone. The engineer sends the video for your series when a task first comes up.
Video libraryOne task per video, sent for your series
Moisturising
The moisturising routine for your printhead type.Cleaning
The cleaning routine for your printhead type.Red-light positioning
Lining up the red cross with the start of the print.White and colour
A white layer under colour, on selected areas or as a full base.Printhead replacement
Removing a printhead and fitting a new one, ribbon cables in order.Routine maintenance
The checks the machine needs over months of use.Part replacement
Changing a worn or damaged part.
Wall printer training for a second operator runs the same way: the same manual, the same six steps, the same videos and the same engineers, on a machine running the same factory colour setup.
Seven steps take the machine from the crate to an approved installation. They are the steps every model shares; where your manual shows a different part or order, follow your manual.
- Check the crate
- Base and rails
- Column and print unit
- Plugs and cables
- Ink and priming
- Test lines
- At the wall, video
- Six-step print routine
Step 1: Check the Crate and Count the Parts
- Check the outer packaging. A crushed, split or wet crate is photographed from each side before opening and sent with your order details.
- Open the crate, remove all bags and protective film, and count the accessories against the list for your series.
- Report a missing item the same way, with a photo of what is there.
Lay out the tools
- Hex keyssupplied
- Screwdriveryours
- Spirit levelyours
- Tape measureyours
The level and tape measure come out again at every new wall. Keep the manual for your model open from here on.
Step 2: Build the Base and Floor Rails
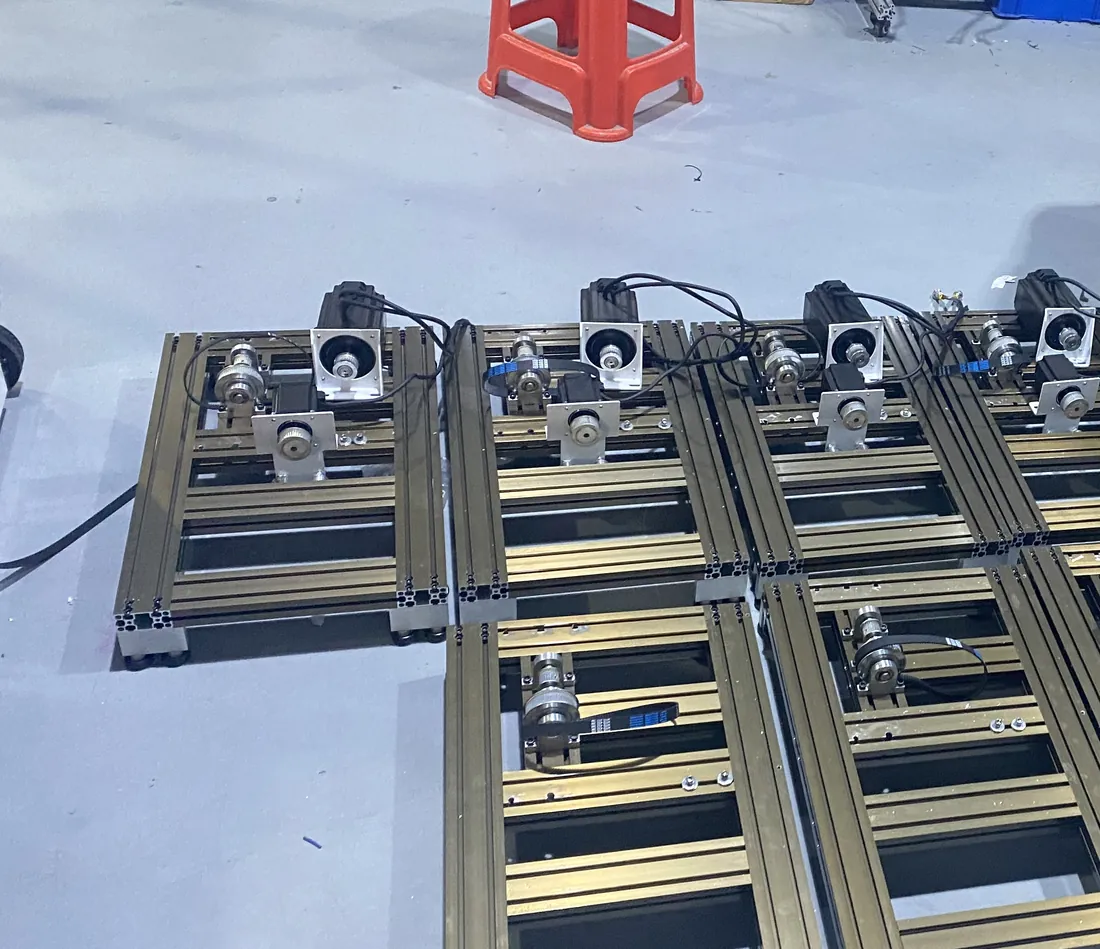
- On rail setups, fit the wheels into the floor rail sections and fix them.
- Join the sections end to end, each joint held by a fixing strip across its middle. Lock all screws.
- Lay the drive belt straight on the floor beside the rails, with no twists, ready for Step 3.
- Slide the machine along the rails by hand from end to end. If it catches at a joint, loosen it, realign and lock again.
Step 3: Stand the Column and Fit the Print Unit
- Set the column on the base, seated on its positioning pins, and lock it. Join a sectioned column first; on folding-rail series, raise the frame and fix the steel strip across the fold.
- Route the belt over the column wheels without crossing, then tension it with no slack anywhere. Your manual shows which face goes up.
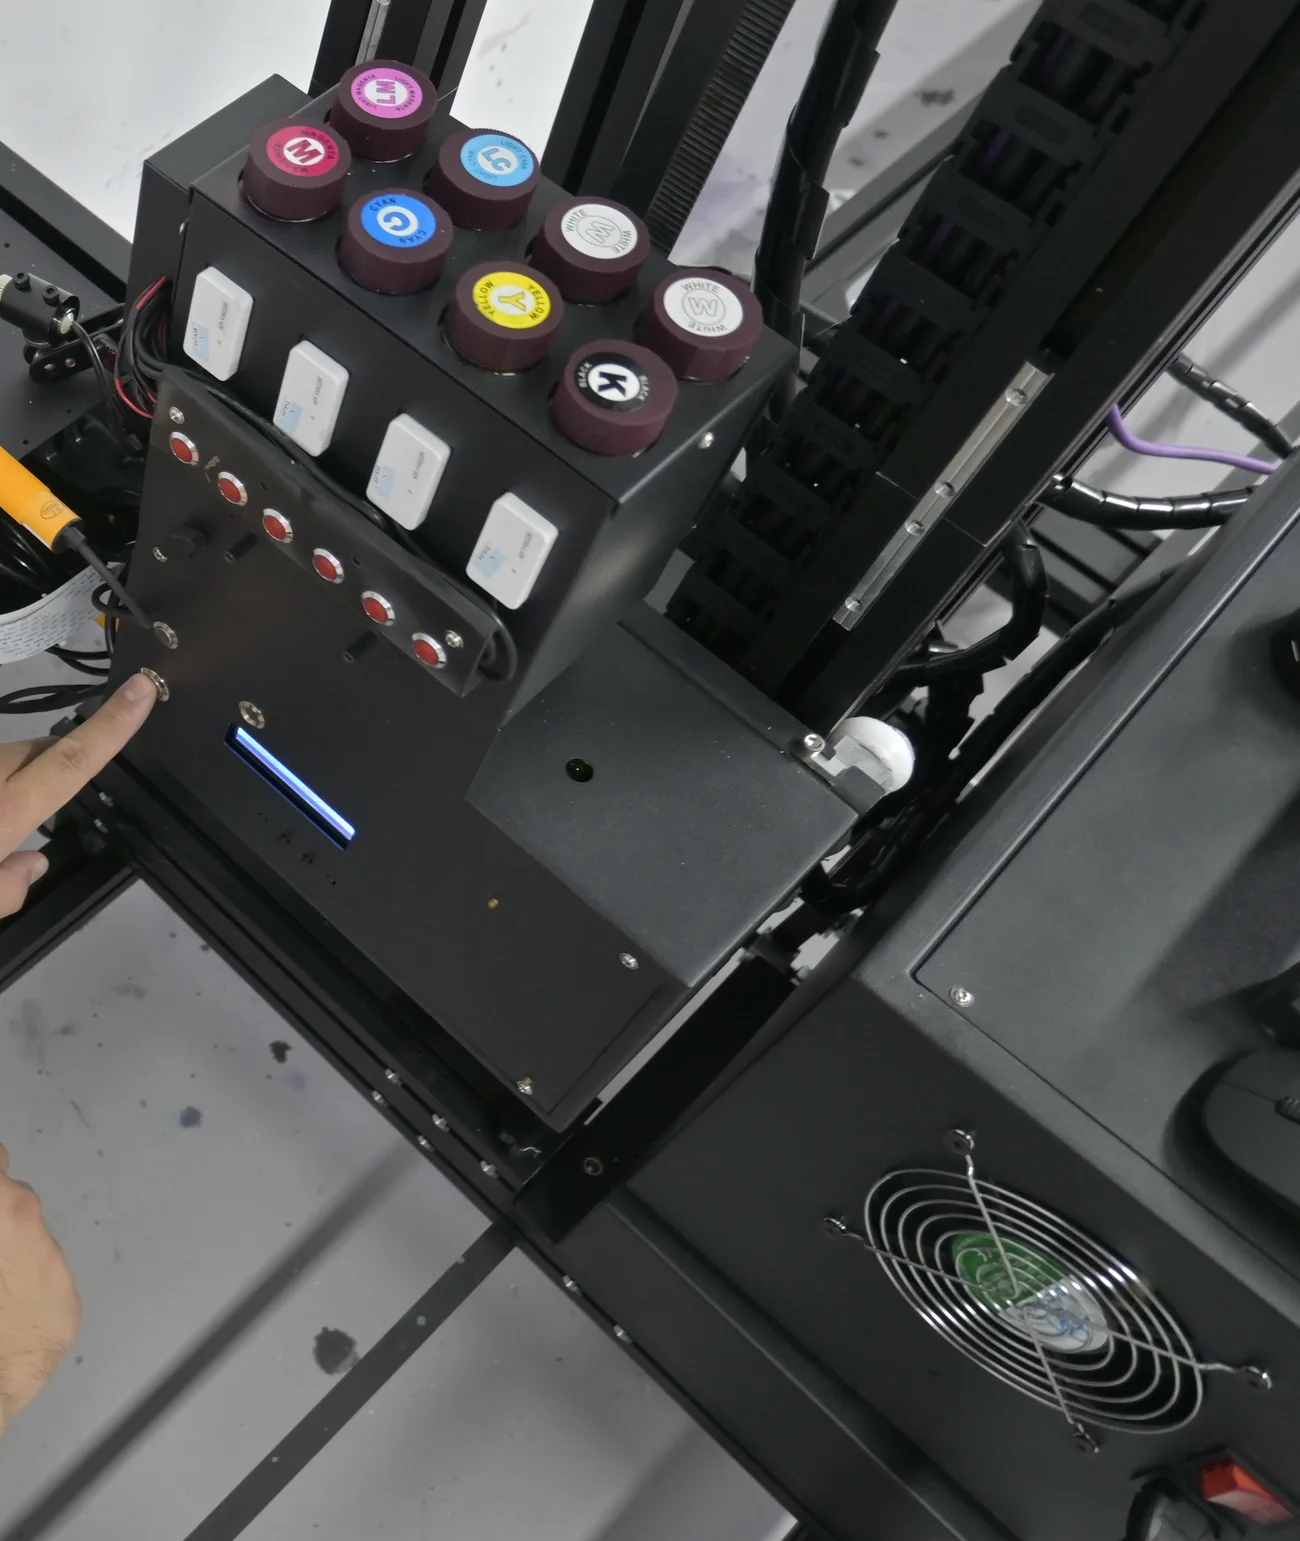
- Fit the print unit, which holds the printheads, the UV lamp and the distance sensors. It locates on positioning screws and is held by hand screws.
- Install the drag chain that carries the cables up and down with the print unit.
- Fit the support rods that brace the column. Once tight, the column should not shake.
- Fit the screen bracket at your height, mount the screen and add the mouse and keyboard tray.
Step 4: Connect the Aviation Plugs and Cables
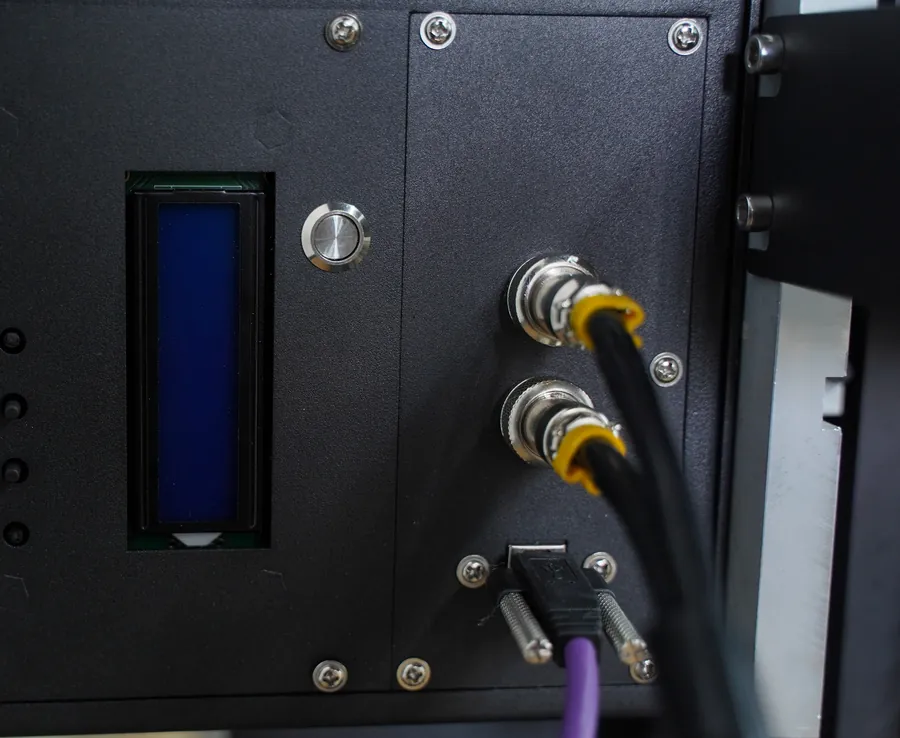
The machine connects through round aviation plugs, and you make and break the same plugs at every site. Match each plug to its socket by the pin pattern, push it home and tighten the outer nut: drag chain plug to the print unit and chassis, then the plugs on the side of the chassis.
Data and power
- Supply
- AC 110–220 V
- Frequency
- 50–60 Hz
- Power
- 2000 W
- Files
- USB 3.0
Connect USB between computer and machine as your manual shows, and HDMI to the screen if your configuration uses one. On the GP200B, images can also go over WiFi. Where computer and print unit have separate switches, switch on the computer first.
Photograph the plugs and sockets once connected. With the Step 7 video, it is the engineer's reference for any later question about a connection.
Step 5: Fill the Ink and Prime the Printheads
- Fill each tank from the bottle with the same colour label: four tanks for CMYK, every tank for white or extra colours. Stop when ink shows at the mouth of the tank.
- Leave the tank cap loose. A tightened cap stops ink from flowing to the printheads.
- Remove the printhead protection cover.
- Fit the suction tool to the printhead on its magnetic fixing points so it seals, and draw ink until the syringe runs without air.
- Hold a paper towel under the printhead as the tool comes off, then wipe the printhead face with it. Reuse the tool; pour the waste ink away.
| Printhead | Priming tool |
|---|---|
| DX10 | Electric ink suction unit, at the press of a button |
| DX7, I1600, I3200 | Single-head manual suction tool |
Step 6: Print the Test Lines
The test lines show whether every nozzle row is firing before you print on a wall.
- Open BetterPrinter, the control software, and check that the machine's status icons are lit.
- Set the flash spray as your manual shows and switch it on, so the printheads start firing.
- Hold white paper against the printhead for a moment, take it away and read the pattern.
- Turn the flash spray off when every line is complete.
Photograph your first test lines and send them; the engineer checks them against the pattern for your printhead. From then on, print the test lines before every print.
 Your installation video
- The rail
- The column
- The print unit
- Cable connections
Step 7: Set the Machine at the Wall and Send the Video
The machine is set up again at every new wall, and two distances decide how the print comes out.
- Move the machine close to the wall. On rail setups, set the rail parallel to the wall at the same distance at both ends; your manual gives the distance for your model.
- Raise the fixing supports so the rail wheels are off the ground, and check the spirit-level bubble sits centred at each position along the rail.
- Adjust the leg cups under the rail until the column keeps the same distance to the wall top to bottom, within 5 mm, from start of print to end.
- With the wall-distance sensor off, bring the printhead to 3 mm or less from the wall without touching. Switch the sensor back on so the ultrasonic sensors follow the wall.
The two distances
Then record a video of the whole machine at the wall, showing the rail, the column, the print unit and the cable connections, and send it to us.
An after-sales engineer reviews the installation and tells you if anything needs correcting before the first print. Keep the video: it shows how your machine stood on day one.
Installation approved · every print from here
Wall Printer Training Lesson One: the Six-Step Print Routine
Once the installation is approved, every print follows the same six steps. This is the routine you practise in your first remote wall printer training session.
Power
Switch on computer and printer, open BetterPrinter and check the machine shows online. Switch on the wall-distance sensor.Ink
Check tank levels and print the test lines. The machine alerts you when ink runs low and stirs white ink on white configurations.Image
In an editor such as Photoshop, convert to CMYK, set width and height, save as TIFF. 300 dpi or more prints sharp at wall size. For white under colour, add a white spot channel at full solidity.Mode
Open the file in Ultraprint on a new canvas, rotate it 90° clockwise once, check the ICC profile and choose Normal for speed or Plus even for quality. Print to a PRN file and wait for 100%.Place
In BetterPrinter, open the preview, double-click the job and set the start point in millimetres. With the red-light locator, the red cross marks where the image starts.Print
Press start. The ultrasonic sensors hold the gap over unevenness up to 1.5 cm and the LED UV lamp cures as it prints, so the wall is dry at the end.
Daily, weekly and idle-time printhead care, and the checks at every new site, are on our Consumables and Maintenance page, next to the liquids and parts they use.
The After-Sales Team and How to Reach It
MAXWAVE builds and tests every machine on its own production line; WallPrintJet, its brand, chooses the configuration with you, quotes it and supports it after delivery.
What the engineers do
- Review your installation video
- Check your first test lines
- Run your remote training
- Send the video for your series
- Stay online during a first flush or part change
- Guide you through fitting a part
They work from the factory setup on your machine: the series, printheads, ink configuration and base on your quotation, the software and ICC curves installed before shipping, and your installation video.
One contact for every question
Write through the WhatsApp number and email you used for your quotation, whatever the question. Owners who bought through a distributor use the same route.
Put everything in the first message
- Series, printhead and ink configuration
- Date of purchase
- Date you noticed the problem
- What you were printing and what you saw
- Photos and a video
- The print file, if colour or position is involved
Warranty and after it
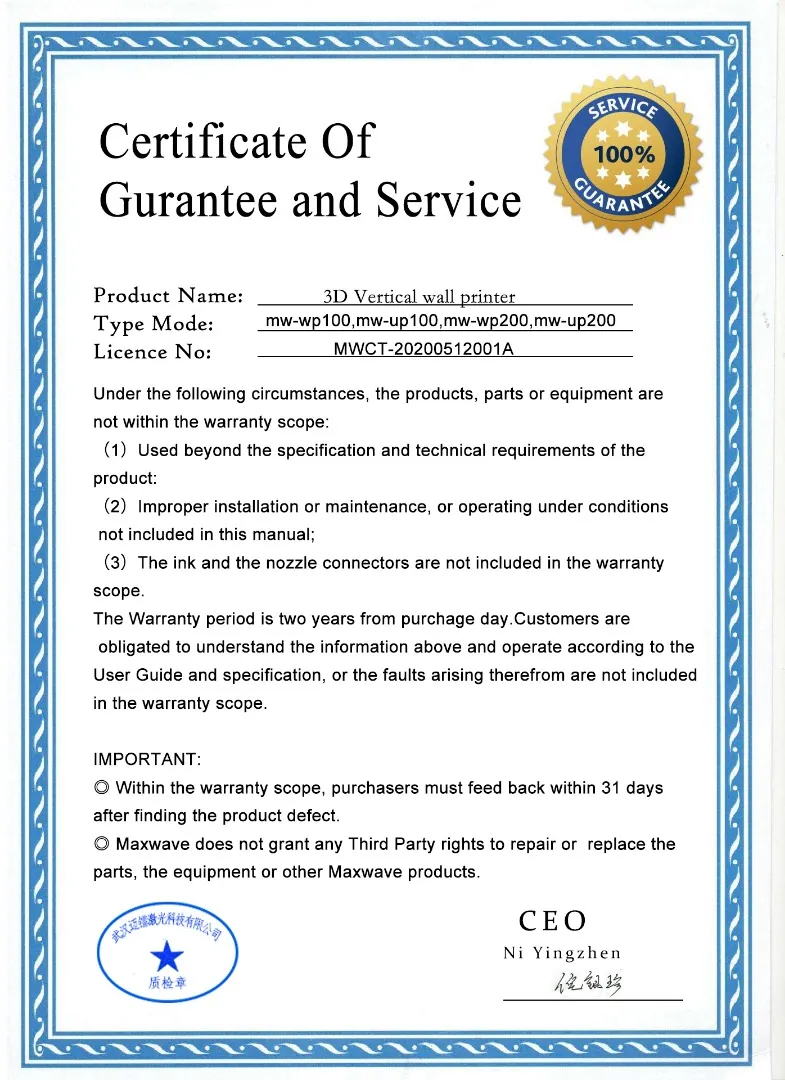
The 2-Year Warranty and Support After It
- Term
- 2 years on the machine, from the date of purchase
- Issued by
- MAXWAVE (Wuhan Maxwave Laser Technology Co., Ltd), signed by its CEO
- Not covered
- Ink and printhead connectors
- Report window
- Within 31 days of finding a defect, so note the day you first see it
Every claim goes to WallPrintJet
You
- Send photos and videos
- Review them online with the engineer
- Fit the part with the replacement video
WallPrintJet
- Confirms whether it is a defect
- Builds the case: report, configuration, installation video, purchase date
- Guides the fitting online
MAXWAVE
- Handles the case with WallPrintJet
- Ships the replacement part through the usual route
You do not write to the factory, explain the machine twice or chase the claim yourself.
Keep four things together
- Warranty certificate
- Purchase record
- Quotation
- Installation video
Support continues after the warranty. Technicians answer whether the machine is three months or three years old, and out-of-warranty faults are guided online the same way.
Wherever you are with the machine
Send Your Model and Your Question
An after-sales engineer or our sales team replies with the next step.
- Running a machine nowSend your series, printhead type and a photo or short video of what you are working on.
- Machine arriving soonTell us the series and delivery date, and book your first remote training session.
- Still choosingSend a photo of the wall with its width and height; we reply with the series we recommend, a quotation and the warranty terms.