Troubleshooting · Printhead & Software
Wall Printer Troubleshooting for Printhead and Software Problems
Wall printer troubleshooting that starts from what you see. Every fix below follows the same steps: what you see, why it happens, what to do, and when to call our engineers.
WallPrintJet is a MAXWAVE brand. The fixes follow MAXWAVE's printhead and software operating guide. Daily printhead care is on the Consumables and Maintenance page; replacing parts is on the Ink and Parts page.
- BetterPrinterand Ultraprint fixes
- Videofor the longer procedures
- Onlineengineers in and after warranty
- 2 yearsmachine warranty
Test print · Head 1Check
KCMYW
Missing line · MDraw 3–5 ml with the suction tool, print again
Find what you see
- Test printLines missing on the test print
- Test printColours running into each other on the test print
- During a printColour stops halfway through a print
- White inkWhite shows beside the colour
- ColourColours look different from the file
- SharpnessPrint looks soft, doubled or stepped
- DryingPrint still sticky after printing
- Error codeError 1004 on screen – USB data lost
- Error codeError 1001 – image taller than the column travel
- PositionPrint starts in the wrong place or comes out sideways
- WallMachine hits a skirting or step near the floor
- SurfacePrint peels off glass, tile or metal
Problem 1 · Test print
Missing Lines on the Test Print
The test print draws one line per row of printhead nozzles. Print it before every wall and keep the photo for the engineer.
- What you seeOne or more lines on the test print are broken or missing.
- Why it happensAir or thickened ink is blocking some nozzles, so they stop firing.
- What to do
- Check the ink tank for that colour has ink and its cap is loose.
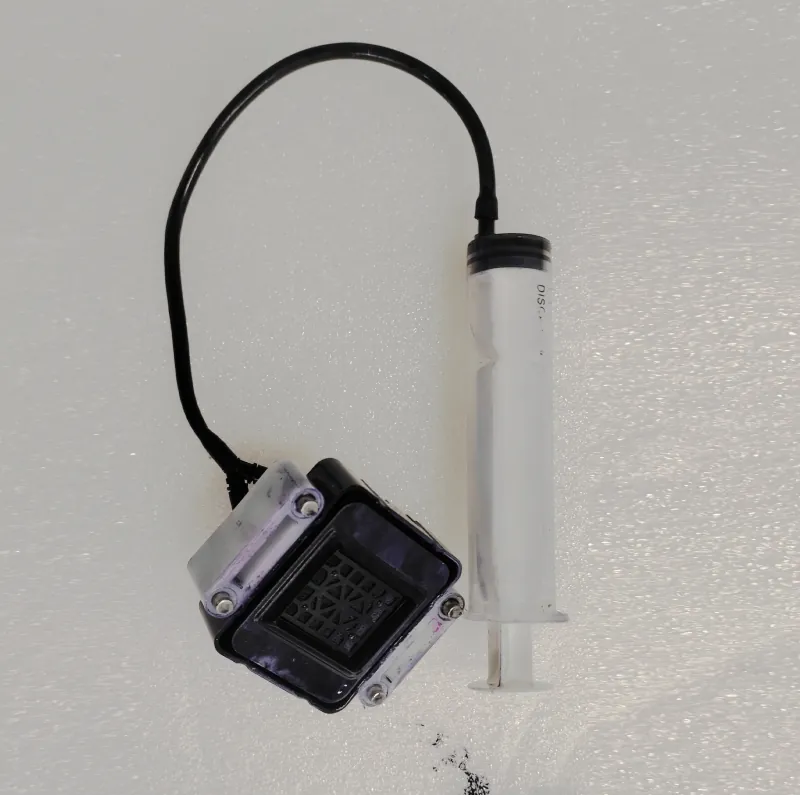
- Fit the ink suction tool (a syringe with a cap that fits the printhead) and draw out 3–5 ml of ink.
- Print the test lines again. Repeat once if the lines come back only partly.
Send it to the engineerif the lines are still broken after a second suction. Send a photo of the test print and your printhead type.
3–5 mlper suction, then print again
A complete test print, by printhead
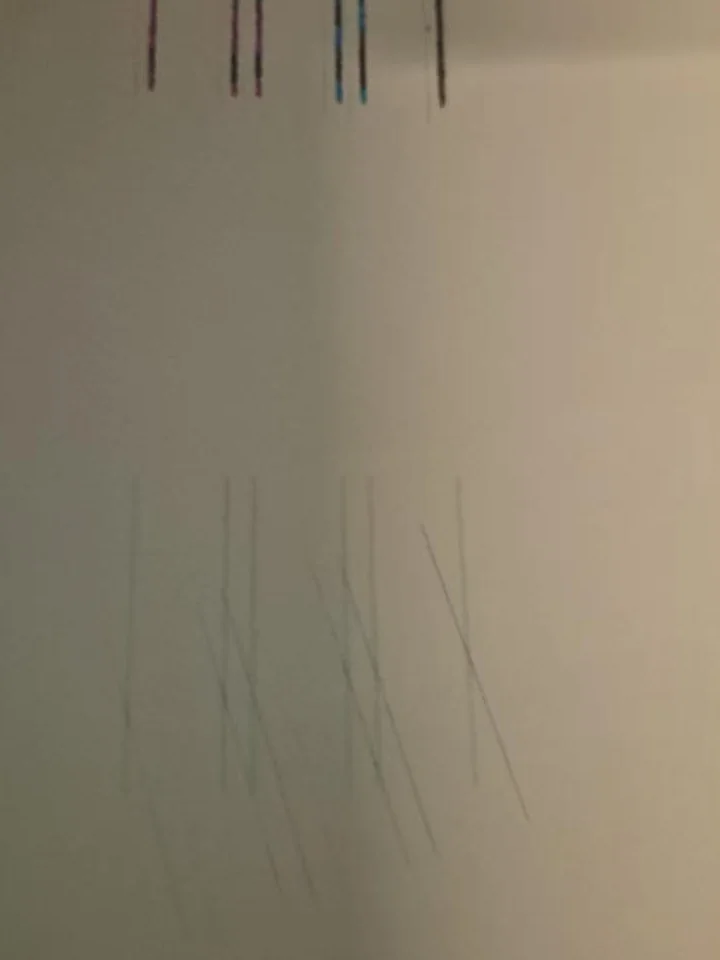 DX7One fine line per colour
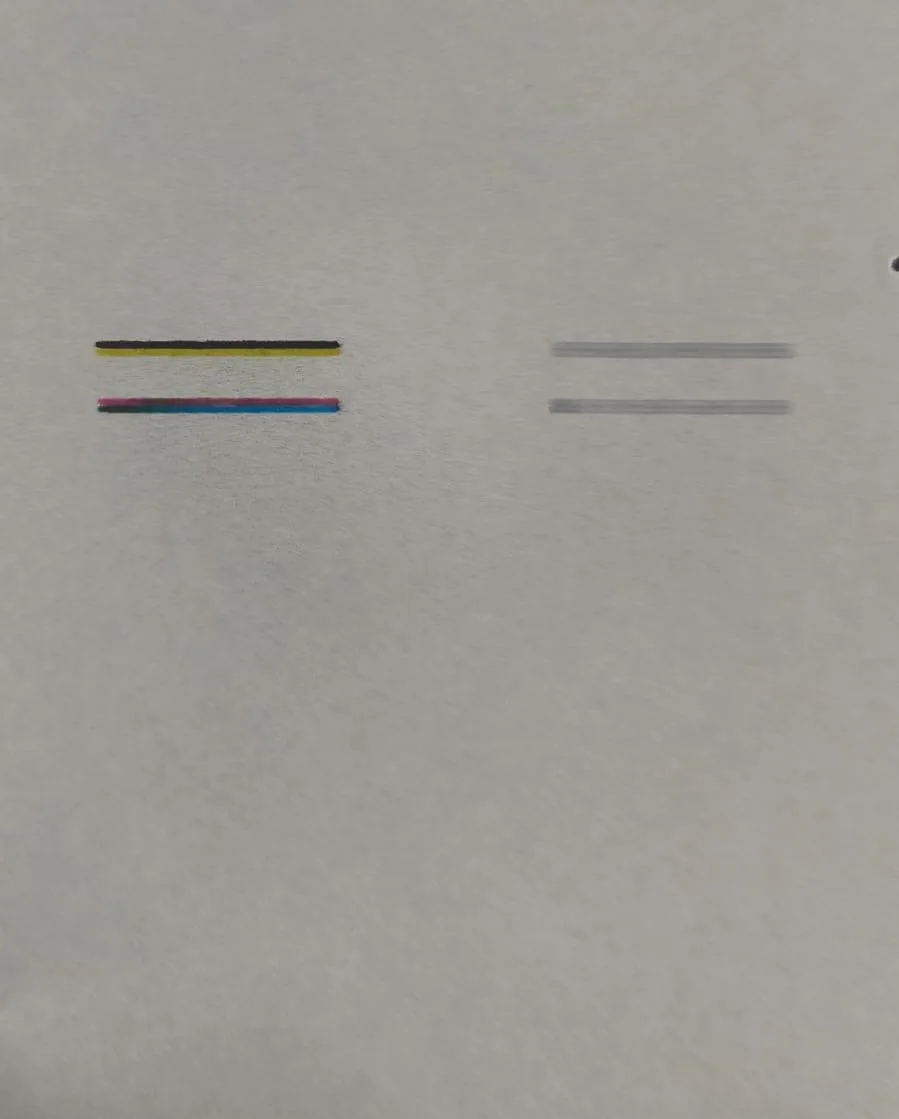 I1600Short paired lines per colour
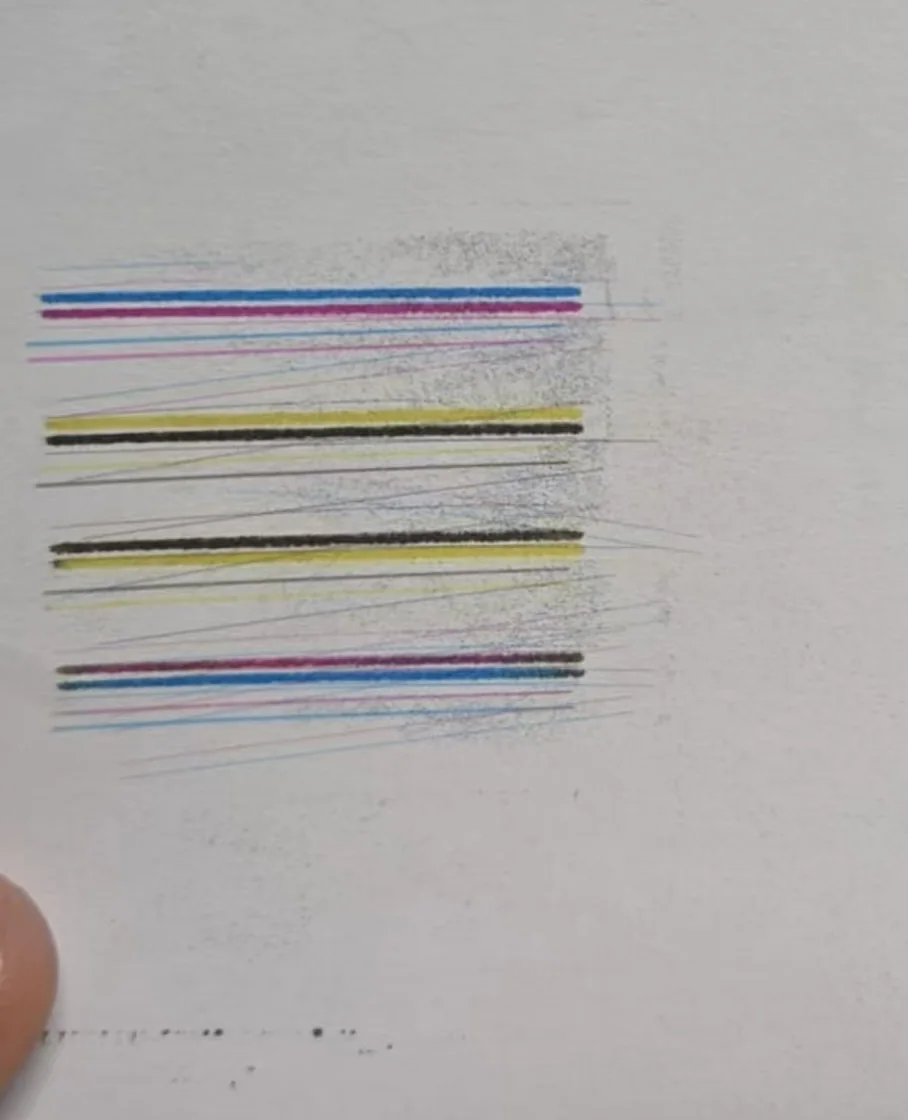 I3200Long bands, one colour each

Problem 2 · Test print
Colours Mixing on the Test Print
- What you seeColours run into each other on the test print, for example magenta showing in the cyan band.
- Why it happensInk has spread across the nozzle plate (the flat face of the printhead where ink comes out).
- What to do
- Click Clean in BetterPrinter. Hold the printhead away from the wall so the ink does not spray onto it.
- Still mixed: set Flash (the printhead firing non-stop) to 16 Hz, switch it on for 3–5 minutes, then off.
- Print the test lines after each step.
- Still mixed: clean the printhead by hand as the MAXWAVE video shows, with a paper towel underneath.
Send it to the engineerif colours still mix after hand cleaning. Send before and after photos; a new printhead is confirmed before you order.
Problem 3 · During a print
Colour Cutting Out Partway Through a Print
- What you seeThe test print was complete, but partway up the wall one colour fades and stops.
- Why it happensInk is not reaching that printhead fast enough.
- What to do
- Loosen the ink tank cap. A tight cap stops the ink flowing.
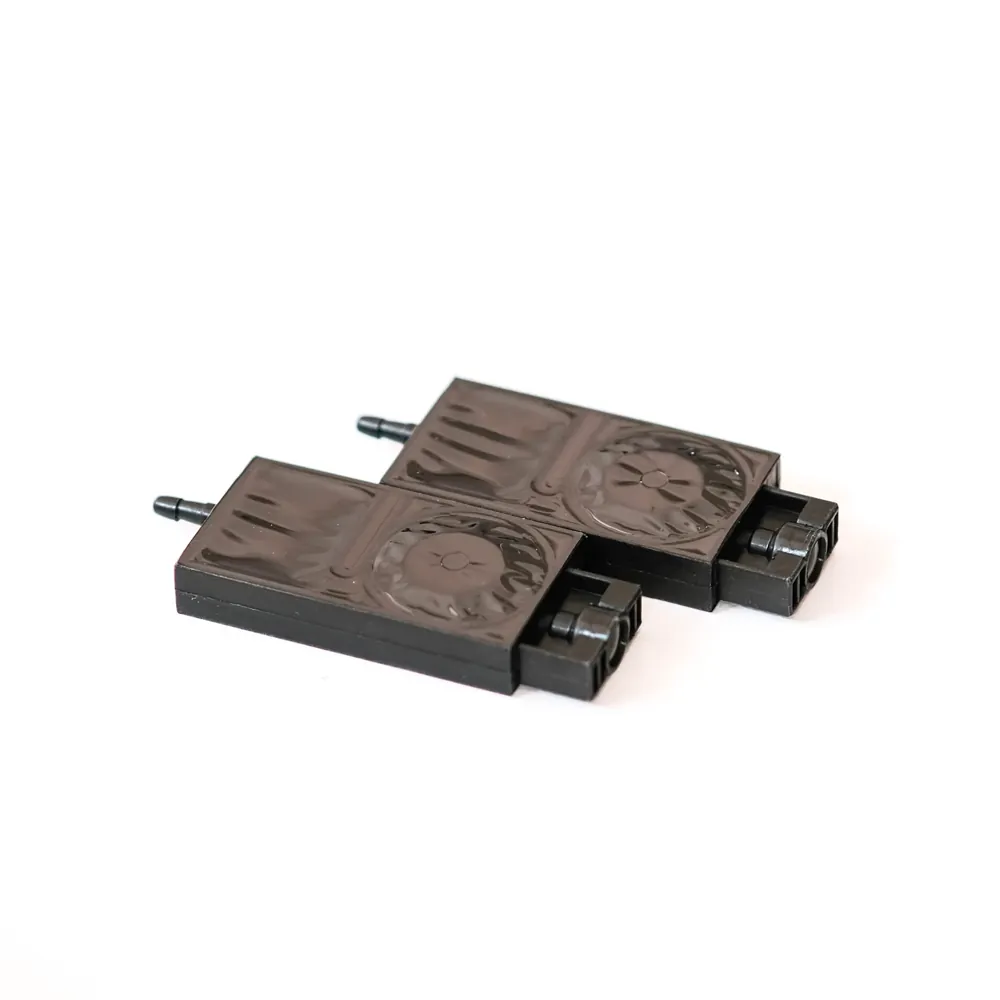
- Same colour every time: replace that colour's damper (the small ink bag just before the printhead). Spares come with the machine.
- Air bubbles in the ink tube: push the ink from the damper back into the tank, then draw it out at the printhead with the suction tool until no air is left.
- Measure the gap between column and wall at the top and the bottom. Keep the difference within 5 mm.
Send it to the engineerif the same colour still cuts out. Send a short clip of the print unit running with the ink tubes in view.
Before every wall
Print the Test Lines Before Every Wall
Keep the photo; the engineer asks for it first.
Send a Pattern Photo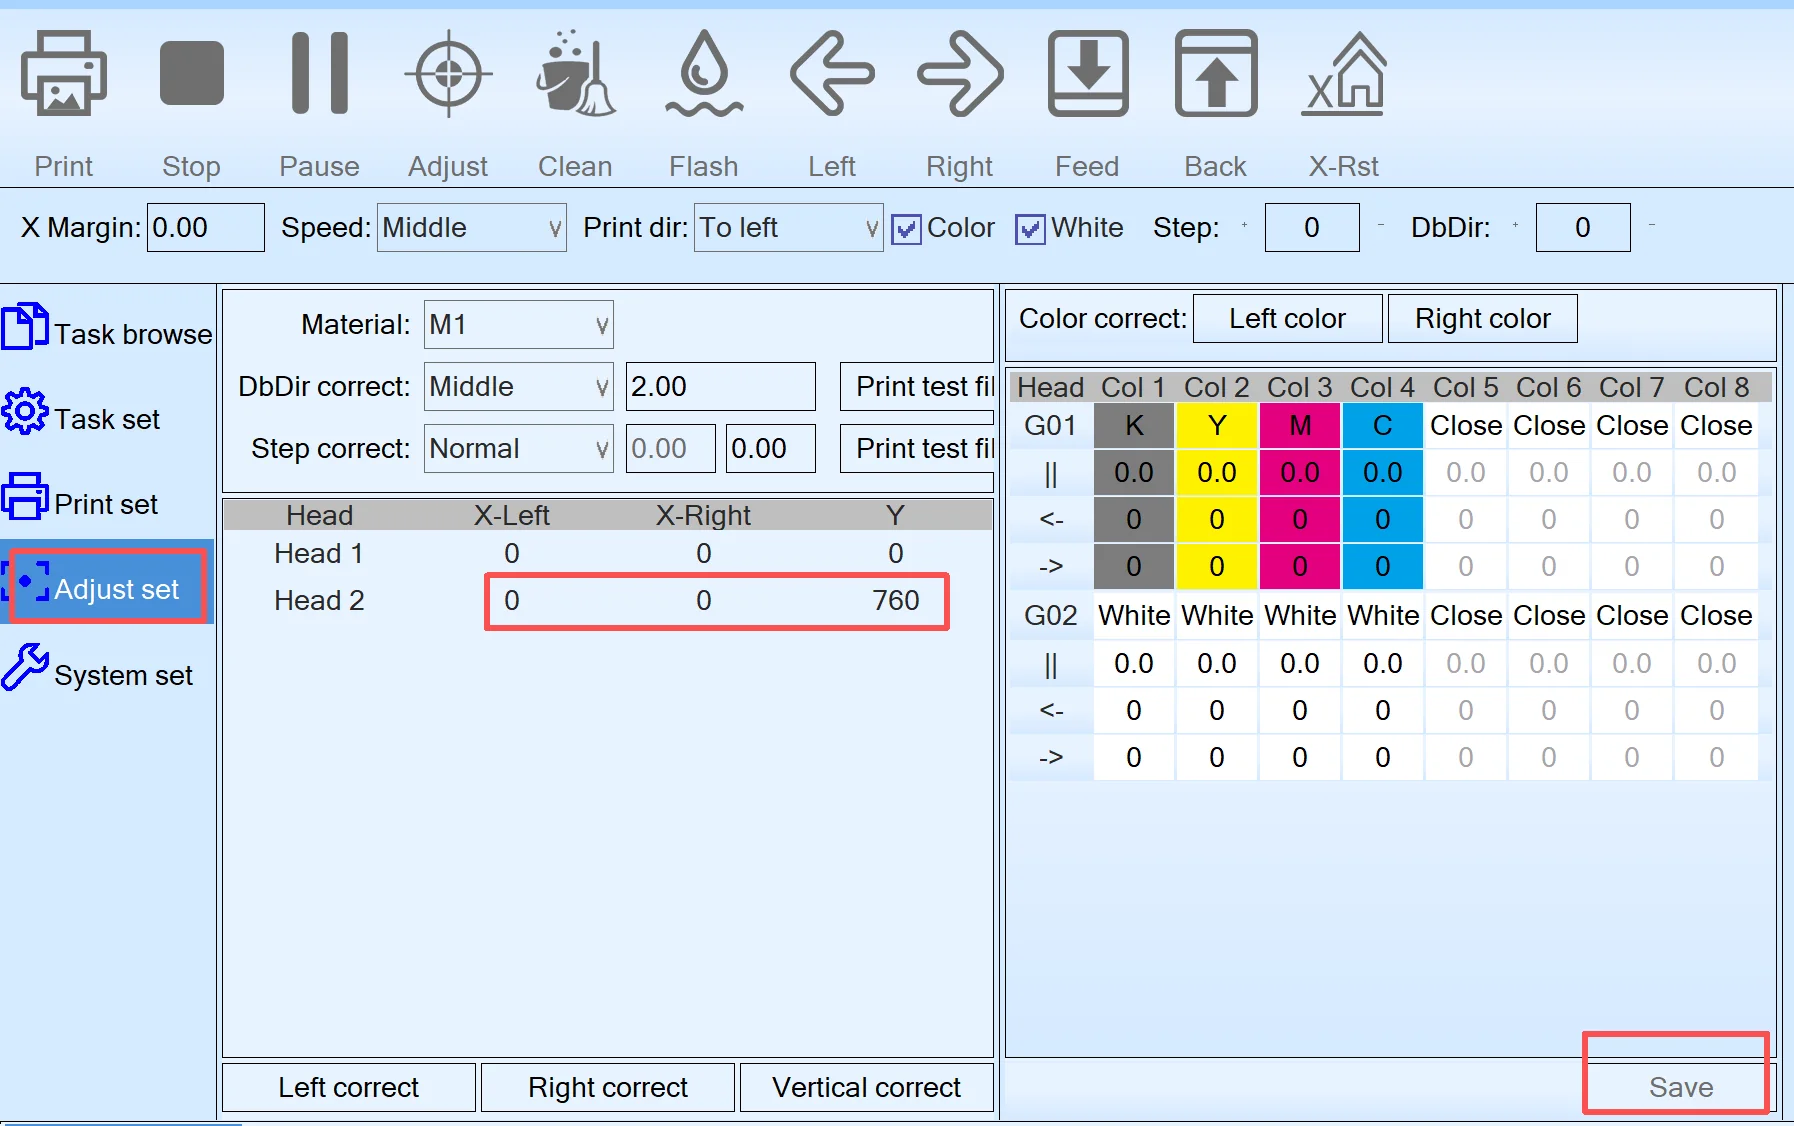
Problem 4 · White ink
White Showing Beside the Colour
- What you seeOn a CMYK + W machine, a white edge shows beside the colour instead of hiding under it.
- Why it happensThe white printhead and the colour printheads are set slightly out of line in the software.
- What to do
- Print the calibration pattern and see which way the white sits off: sideways, or up and down.
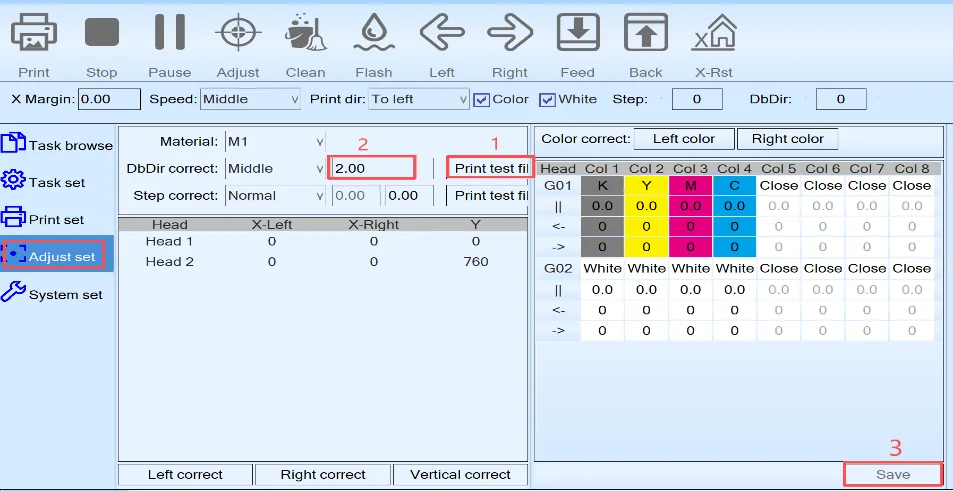
- In BetterPrinter's Adjust set, change one value at a time: Y moves the white sideways; X-Left and X-Right move it up and down.
- Print the pattern after each change. Stop when colour and white overlap, and write the values down.
Send it to the engineerif the pattern will not line up. Send the pattern photo and the values you tried. Re-check after a printhead change.
White in the file: two ways
Full white base
White under the whole image. For full murals on dark or coloured walls. MAXWAVE video: full white baseProblem 5 · Colour
Printed Colours Different from the File
- What you seeThe print is darker, paler or a different tint from the file on screen.
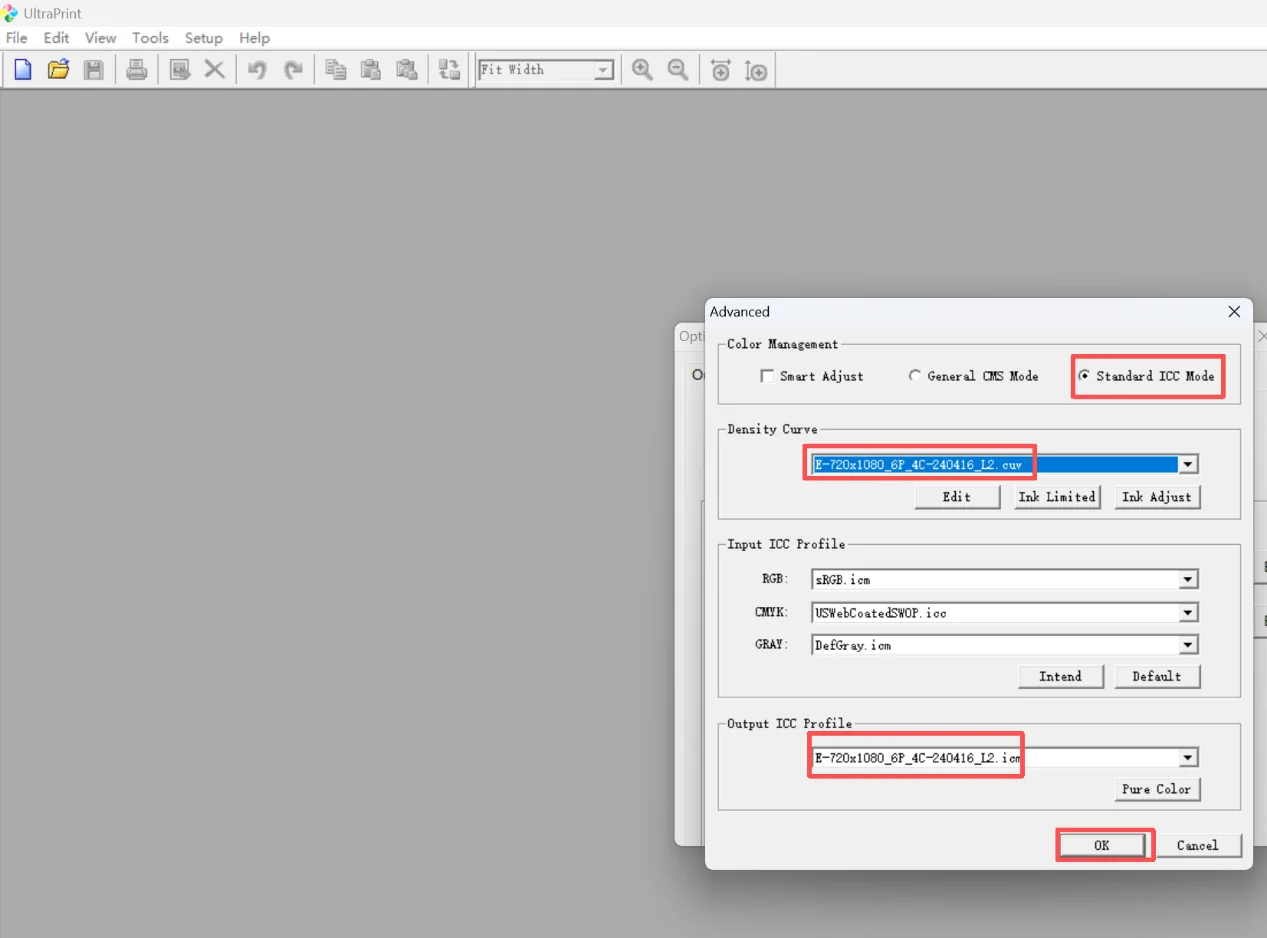
- Why it happensUsually a missing line on the test print, a changed print resolution, or the ICC profile (the colour table matched to your ink) not applied.
- What to do
- Print the test lines and fix any missing lines first.
- Set the print resolution back to the default for your printhead (table below).
- In Ultraprint, select the ICC profile and apply it to the image.
Printhead Default resolution I1600 720 × 1200 I3200 720 × 1200 DX10 720 × 1080
Send it to the engineerif the colour is still off. Send the file, a photo of the print beside the screen, and your settings.
Problem 6 · Sharpness
Soft, Doubled or Stepped Prints
- What you seeEdges look soft or doubled, small text blurs, or straight edges step sideways between passes.
- Why it happensThe printhead is too far from the wall, a part is loose, or the pass calibration is off.
- What to do
- Set the printhead 3 mm or less from the wall, never touching it. Check at the bottom, middle and top.
- Push gently on the wheels and column. Tighten anything that moves; replace a wheel with play.
- Stepped edges: print the calibration pattern, add the value on its left to the value in the software, enter the result, and repeat until it lines up at 0.
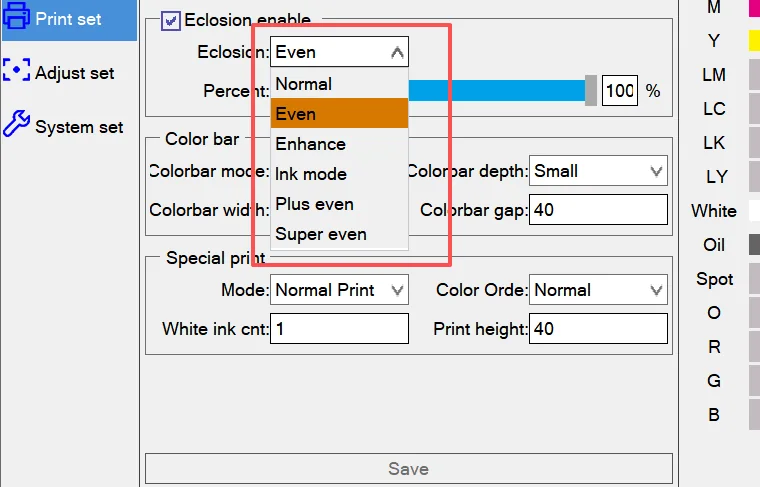
- Fine detail still soft: switch the print mode from Normal (faster) to Plus even (higher quality).
Send it to the engineerif it is still soft or stepped. Send a close-up of the print with a ruler in view and a clip of the print unit running.
Problem 7 · Drying
Sticky Ink After Printing
- What you seeThe print is still tacky, or smudges when touched, after the carriage has passed.
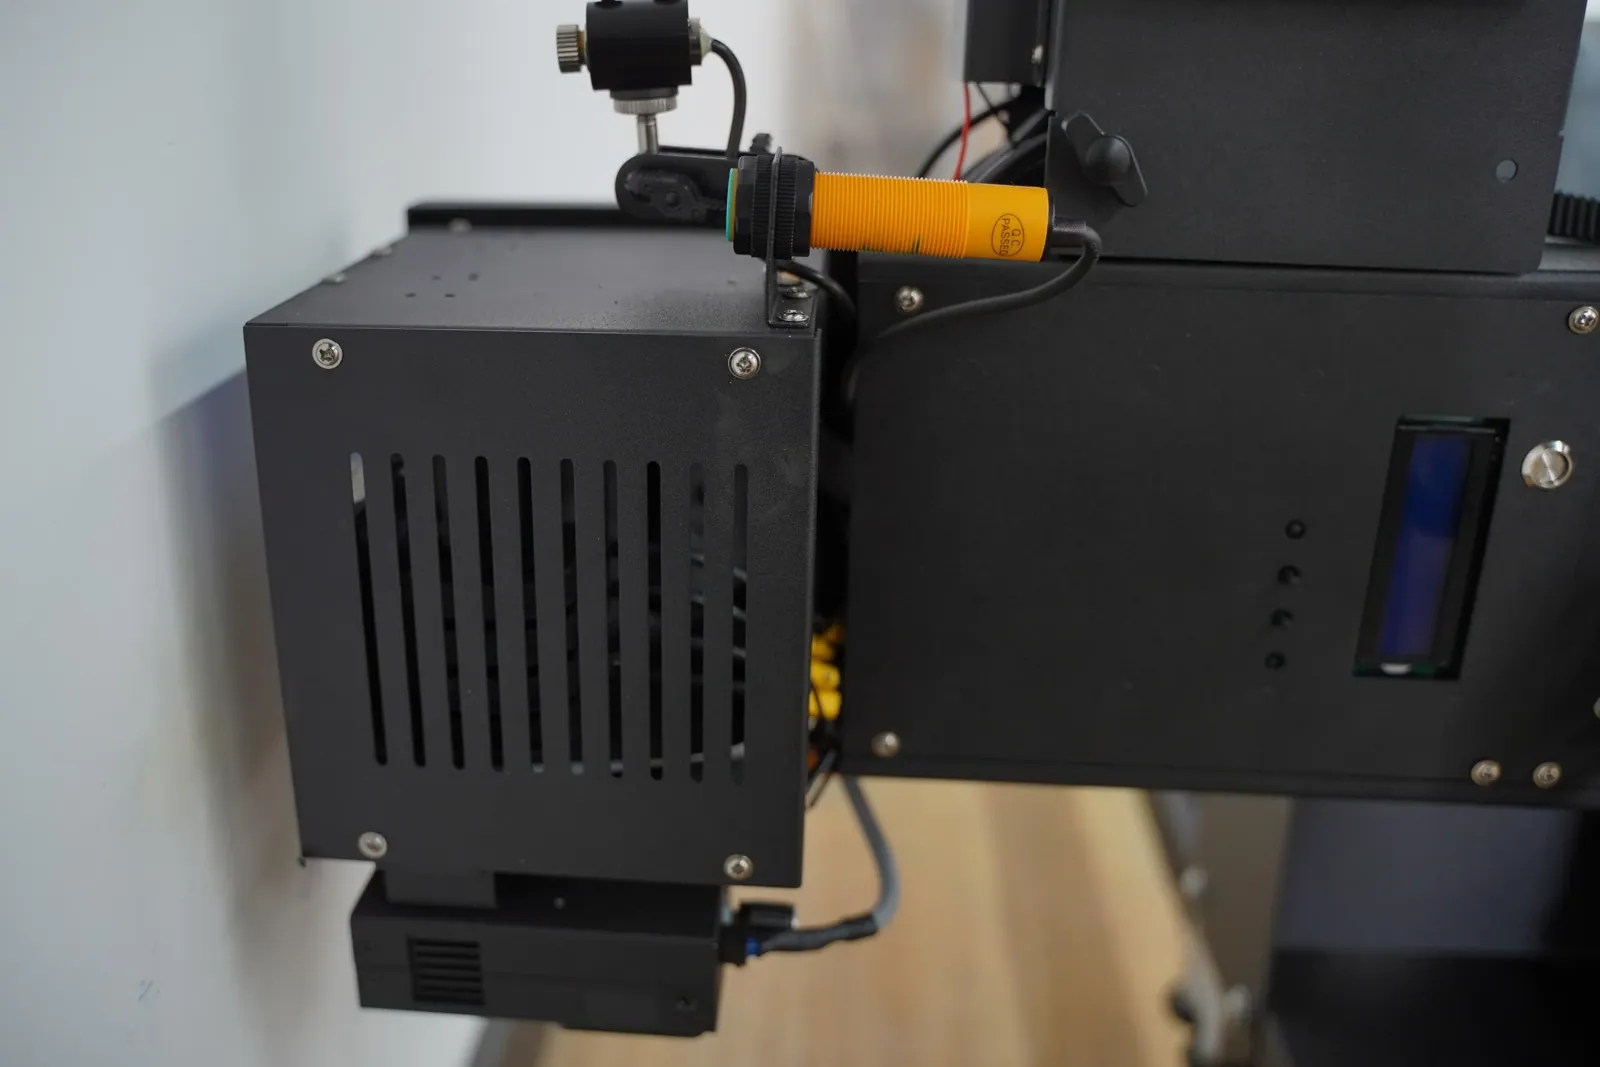
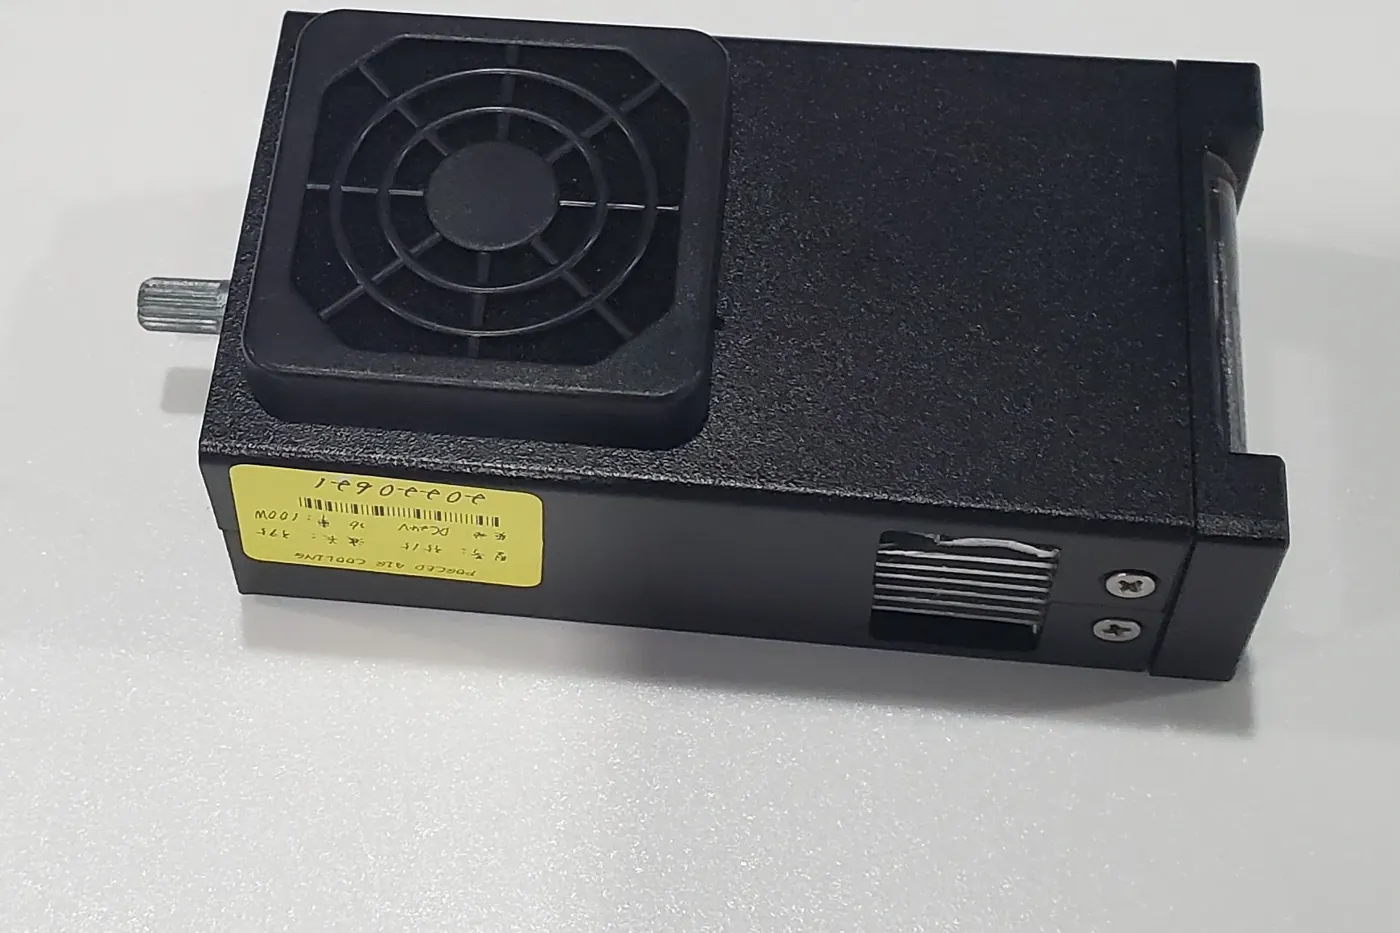
- Why it happensThe UV lamp on the carriage is not giving enough light to cure (harden) the ink.
- What to do
- Switch off, let the lamp cool, and remove cured ink from the lamp face with a blade.
- Turn up the brightness knob on the back of the lamp and print a test patch.
- Clean lamp, full brightness, still tacky: the lamp has aged and is replaced (see Ink and Parts).
Send it to the engineerif you are not sure the lamp is due. Send photos of the lamp face, the knob and the tacky patch before you order.
Problems 8 and 9 · Error codes
Error Codes 1004 and 1001
1004USB data lost
- What you seeError 1004 on the screen and the print stops.
- Why it happensThe data from the computer to the printer over USB was interrupted.
- What to do
- Plug the USB cable into a different port on the computer and send the file again.
- Fix the wires at both ends of the cable chain (the black chain that carries the cables along the column) so they cannot move while printing.
Send it to the engineerif 1004 returns on a new port with the wires fixed. Send a photo of the error and both ends of the cable chain.
1001Image taller than the column travel
- What you seeError 1001 when you send a file to print.
- Why it happensThe image is taller than the travel the machine is set to.
- What to do
- Reduce the image height, or reduce the X Margin value in BetterPrinter.
- Lowered the column for a low ceiling? Lower the maximum travel to match so the unit never hits the top bar. The engineer guides you through this protected setting.
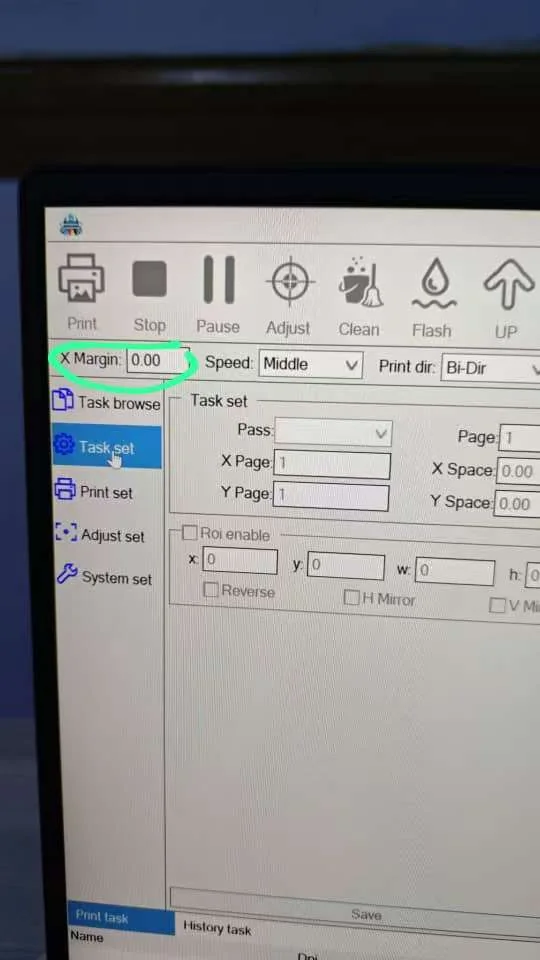
Send it to the engineerif 1001 shows on an image that should fit. Send a screenshot of the image size and X Margin, and say if the column height changed.
Problem 10 · Position
Print Starting in the Wrong Place
- What you seeThe print lands higher, lower or further sideways than the red-light cross showed.
- Why it happensThe red-light cross (marks the start point) and the X value (the start offset in mm) are not calibrated together.
- What to do
- Set the value in the software to 0 and print a small image.
- Move the red cross by hand: horizontal line on the image's bottom edge, vertical line on its side.
- Measure from the cross centre to where the print started and enter that distance in millimetres.
- Check it with a small test print at the next site.
Send it to the engineerif it is still off. Send a photo of the cross and print with a tape measure. MAXWAVE video: red-light positioning
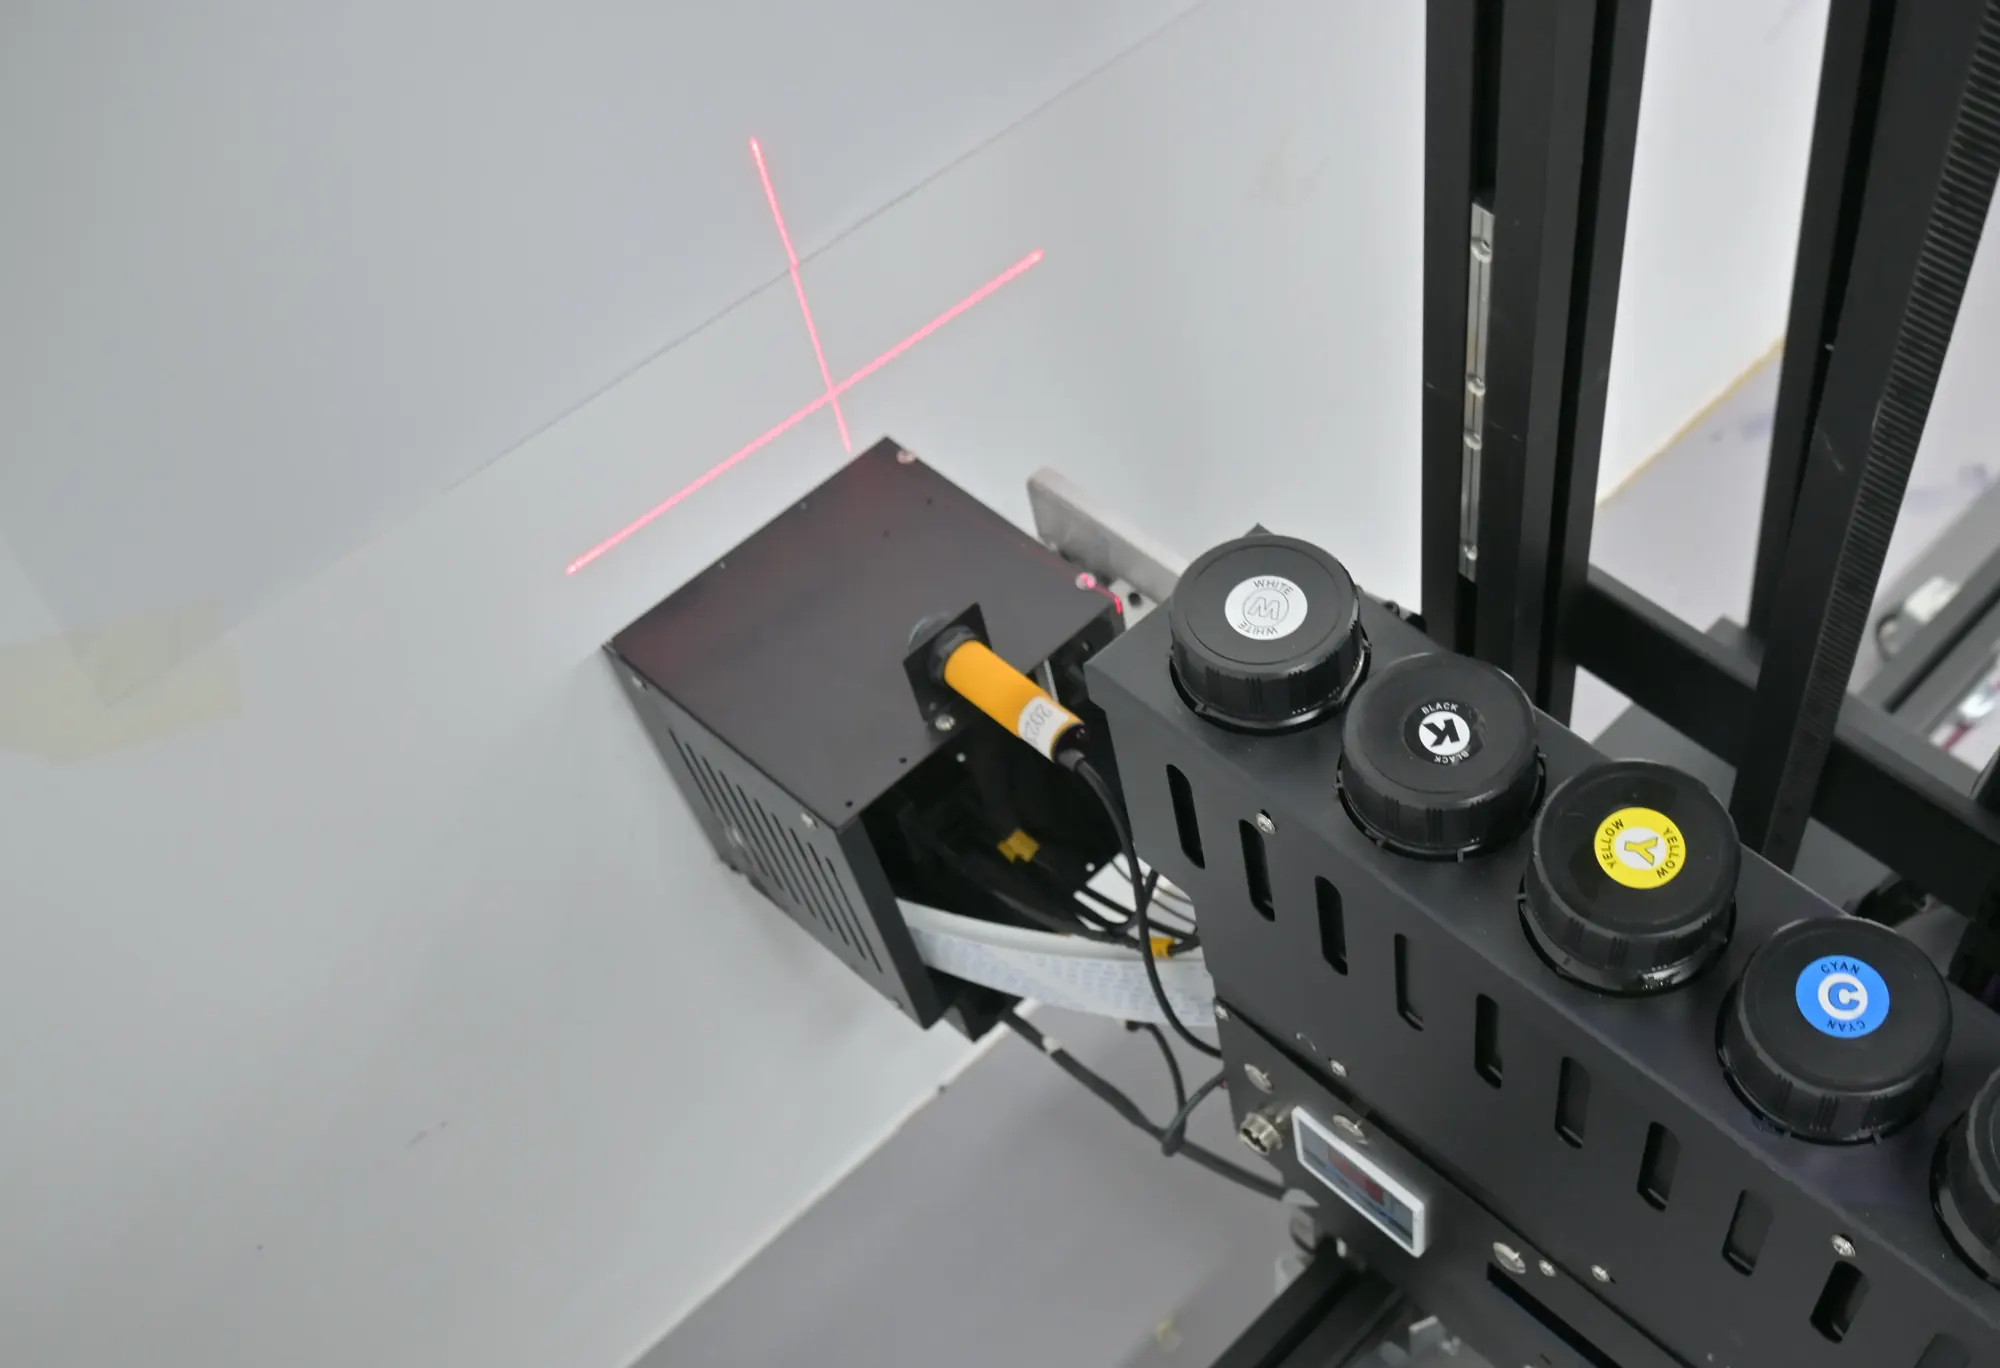
Image comes out sideways
In Ultraprint, rotate it 90° clockwise before creating the print file.Problem 11 · Wall
Skirting or Step at the Foot of the Wall
- What you seeA skirting, step or ledge near the floor stops the print unit going low enough, or the unit hits it.
- Why it happensThe lowest part of the print unit, the lower UV lamp, reaches the obstacle first.
- What to do
- Switch the machine off and move the yellow rubber block so the lower UV lamp starts above the obstacle.
- Reset the maximum travel to the new start point; the engineer guides you, as for error 1001.
- Adjust the wheel supports under the track so the machine sits parallel to the wall, within 5 mm top to bottom.
Send it to the engineer firstif the obstacle is deep or the wall leans. Send a photo with a tape measure before you start.
Problem 12 · Surface
Prints Peeling Off Glass, Tile and Metal
- What you seeA print on glass, tile, metal or another smooth surface lifts at the edges or flakes off.
- Why it happensUV ink cannot grip a smooth surface on its own.
- What to do
- Wipe the matching coating (a liquid that helps the ink stick) over the whole print area.
- Print a small test patch on a corner first and check it before the full wall.
Send it to the engineerif a coated surface still peels. Send a photo of the area, the material and the coating used. Coatings are on the Ink and Parts page.
No coating
When a fix does not hold
Send Your Test Lines and a Short Clip
One message starts it. An after-sales engineer replies with the next step as written instructions, a video, or both, and stays on the thread while you carry it out.
- SeriesGP200, GP200B, UP200 or UP200P
- Printhead and inkDX7, DX10, I1600 or I3200; CMYK or CMYK + W
- ProblemWhich problem on this page you see
- Latest test linesOne photo, in good light
- Short clipThe print unit running
WhatsApp +86 15327155363 (photos, clips)
Email [email protected] (files, screenshots)
How a warranty case is handled: Wall Printer Training.